Find answers fast: Ask a question, search for keywords, or explore articles below.
Search
How to Submit a Trip Request (With Students or Staff Only)
EZActivityTrips makes it easy to submit field trip requests. As you review this guide, please note that your district’s trip request form is tailored to your district’s specific policies. Some sections may or may not apply to your district-specific form.
Any required fields are clearly marked on the form. The form cannot be submitted until all required fields are complete.
Create Request:
When you first log in, you’ll land on your dashboard. To create a new trip request, click + New Trip.
Section 1: General
The first section of the Trip Request form collects basic information, such as your location and trip type. Required fields are clearly marked and must be completed to submit the form.
Category
There are only two categories for trips in EZActivityTrips: Travel with Students and Staff Only. To create a staff trip, select Staff Only. For trips with students, select Travel with Students.
Trip Type
This selection will depend on your district’s Trip Request Form settings. Your selections depend on the category you selected in the previous question.
Trip Event
This selection will depend on your district’s Trip Request Form settings. Your selections depend on the category you selected in the previous question.
Your School/Dept
Use the dropdown menu to select your school or location.
This is important as it will help transportation assign vehicles and determine the correct approver for your trip.
Your district may have more fields in the General section for you to complete. The fields in this tutorial are default fields that are universally required.
Section 2: Leave/Return
The Leave/Return section gathers information on the dates and times for your trips. Your district may have “lead day” requirements in place. This means you must submit the trip within a specified number of days to allow the district sufficient time to prepare transportation. If outside these parameters, you may not be allowed to submit your trips depending on your district’s settings.
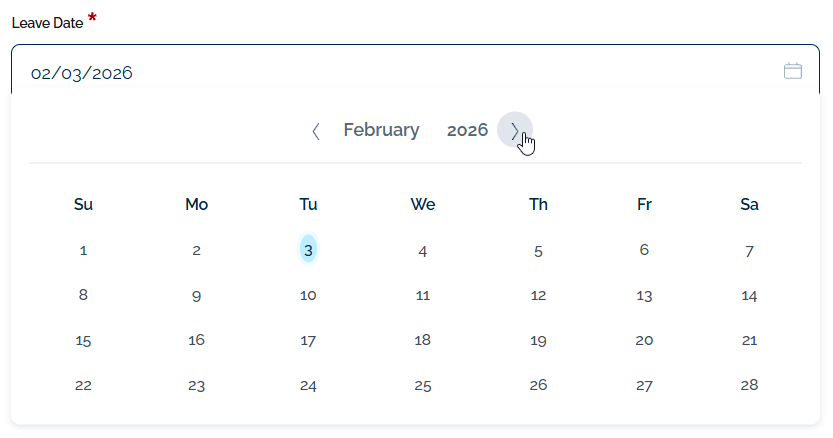
Leave and Return Date
Click on the Leave Date field to open the Date Picker.
Using the Calendar, select the correct leave date. Use the navigation bar at the top to move between different months and years. Once the correct date is selected, click OK.
Your district may have “lead day” requirements in place. This means you must submit the trip within a specified number of days to allow the district sufficient time to prepare transportation. If outside these parameters, you may not be allowed to submit your trips depending on your district’s settings.
The Trip return date will auto-fill with the same date as the trip leave date. If the trip will be overnight, click on the calendar and select the correct return date.
Leave and Return Time
Click on the clock to open the time selection tool.
Use the dropdown menu to select the exact time the trip will be leaving. Click OK.
Repeat this process for the Return Time. You will receive an error message if the Return Time is after the Leave Time.
Overnight/Out of State
Is the trip overnight or Out-of-State? Your district can customize this question. This is an example of how it may read.Selecting “yes” may require your trip to undergo additional approval levels.
Your district may require you to answer other Leave and Return Information questions.
Create Recurring Trips
Your district may allow you to create Recurring Trips. Except for the date, these trips are identical (location, time, destination, vehicle needs, etc.).
If you are requesting a one-time trip, you may skip this section.
To schedule Recurring Trips, click the Create Recurring Trips button in the Leave/Return Section of the Trip Request Form.
There are two options when scheduling a Recurring Trip. However, a combination of these methods can be used.
Date Range: Select the end date, then the days of the week on which the trips occur. This is useful in cases where the trips occur on the same day every week.
Select the end date of the recurring trips, then specify the weekday(s) on which the trip occurs. Finally, click Select Dates. The system will copy all trip information for the selected dates.
Section 3: Destination(s)
This section gathers information about your destinations in order to provide you, your district, and your drivers with accurate mileage and directions.
It is essential to plan your trip itinerary accurately. This itinerary affects the miles to your destination, your return trip mileage, your outbound and return directions, and the trip estimator, all of which may affect trip approval.
Trip Drafts
Once the destination is selected, you may see a button labeled Save as Draft. This tool allows you to save the trip information and return to the form later. It is visible on steps 3-8 of the Trip Request Form.
Section 4: Attendees
This section compiles information about the individuals participating in the trip, including any health or nutritional needs they may have.
Enter the Teacher/Advisor/Staff name and phone number.
Complete the number of students and adults attending the trip.
Your district may have specific requirements for the adult/student ratio.
Click Next to move on the the next section.
Section 5: Transportation
This section gathers information about the types of vehicles used to transport individuals on your trip. The questions answered here will help transportation provide adequate vehicles.
Section 6: Funding
Your district has the option to require a funding source for field trips. If required, you’ll provide that information in this section.
Your district may or may not require a funding Source. If you are required to add one, click the+ Funding Source button. The name of this item may vary depending on your district's settings.
Select the appropriate funding source from the drop-down menu.
Your district may allow multiple funding sources. If this is the case, click + Funding Source again and complete the above steps.
Section 7: Additional Information
This section gathers additional information that may not fit into other categories.
Depending on your Trip Type, you may be required to give the educational objective for the trip.
Once all fields are completed, click Next.
Section 8: Supporting Documents
Depending on your selections in the trip request form, your district may require you to provide additional documents for your trip. You can upload those in this section.
Drag & drop the files into the grey box, or click Browse Files to locate the file on your device.
Submit
Read the conditions set forth by your school district and select Yes to certify that you have read, understand, and accept the trip responsibilities. Click Submit.
If any items on the form have not been filled in correctly, you will see messages above the Submit button. Scroll up through the form to find the errors and correct them.
 Leave and Return Date
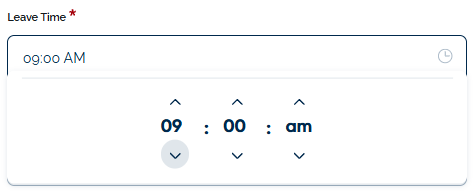 Leave and Return Time
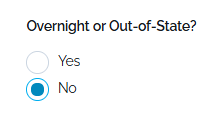 Overnight/Out of State